It's finally here! After two ( very much appreciated ) delays, the final round of the seventh Bead Soup Blog Party is here!
For those who may remember, my partner for this round is Lucie Bouvier and here's what she sent me :)
You may remember that those bottom red and black spotted beads turned out to be poisonous seeds that had been banned in this country, and had to be tossed... so sad :( Despite their unfortunate demise, they did give me an idea for a project using the sole remaining bead in that baggie...
Originally going to be a pendant for a necklace, it ended up becoming a zipper pull/bag charm.. because I needed one :)
See? A cute little death theme zipper pull in honor of 'deceased' poisonous beads ;) lol
Okay... so back to the beginning.
When I got this lovely soup, I was both thrilled and a little stumped... everything was RED. I've never had a single colour soup before.. it kinda threw me for a bit. Still, I immediately sat down and sorted things into baggie with beads from my own stash that I visioned going with them into different projects.
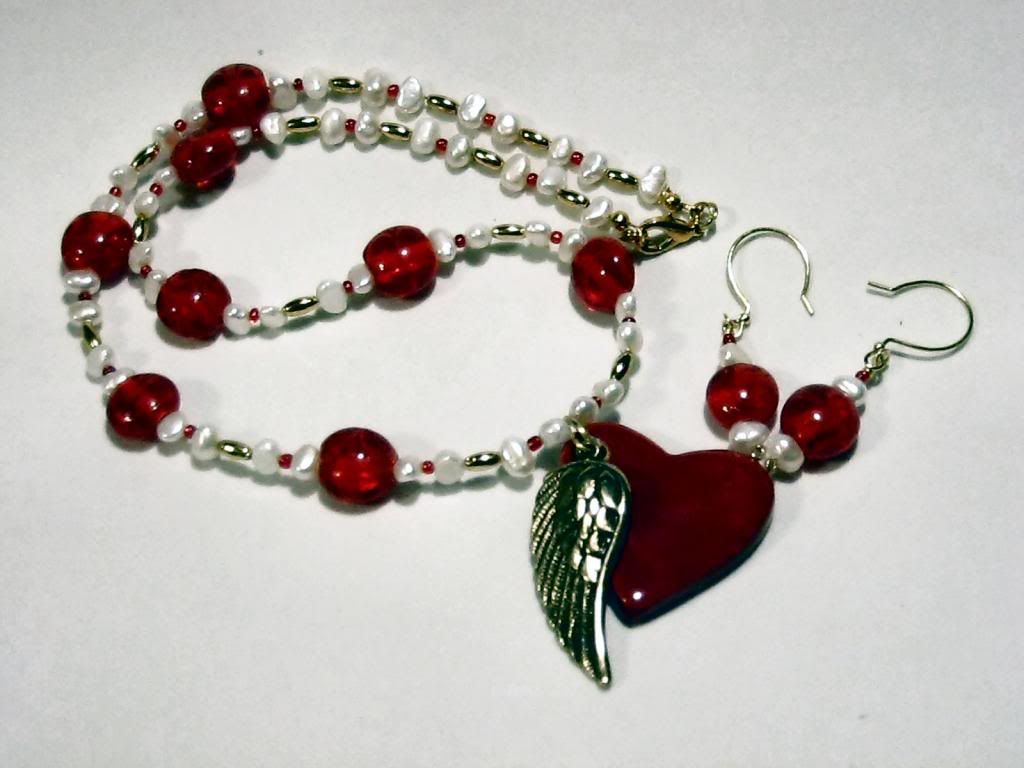
Since the focal is the one that always seems to be the 'ohmygodtherevealistomorrowandIamnotgonnamakeit' piece I'm still working on the day before the reveal, I decided to tackle it first. I knew right off I was going to pair that simple heart with pearls and gold, and that I wanted to add something to the heart itself. I envisioned strands attached via fancy metal connectors, so did up two strands , one for either side of the heart... and then got sick >.< Everything was sealed up into the baggies and set aside. Once I was feeling better... the separate strands/connectors idea no longer struck the same spark it had and so it stayed in the baggie while I played with the rest. Once again, the focal piece became the last one finished >.< lol I think it's now traditional for my BSBP pieces. I tried to resuscitate the connecter idea a couple days ago, but was plagued with head aches that made hammering a bad idea, until today I bit the bullet and took it apart to start from scratch.
Twice.
Really glad I did since I rather like the way it turned out :)
 |
| Heart on the Wing |
Sticking with my original colour scheme/layout, I alternated white potato pearls, red glass seed beads, and gold oval beads with the red swirled glass beads Lucie sent me. The golem Beads heart pendant has a gold coloured wing layered over top .. and of course, I made matching earrings :)
If that was my LAST completed piece... what was my first, you ask?
Well duh... when stumped, fall back on the best muse kick starter... EARRINGS!
 |
| Gothic Droplets |
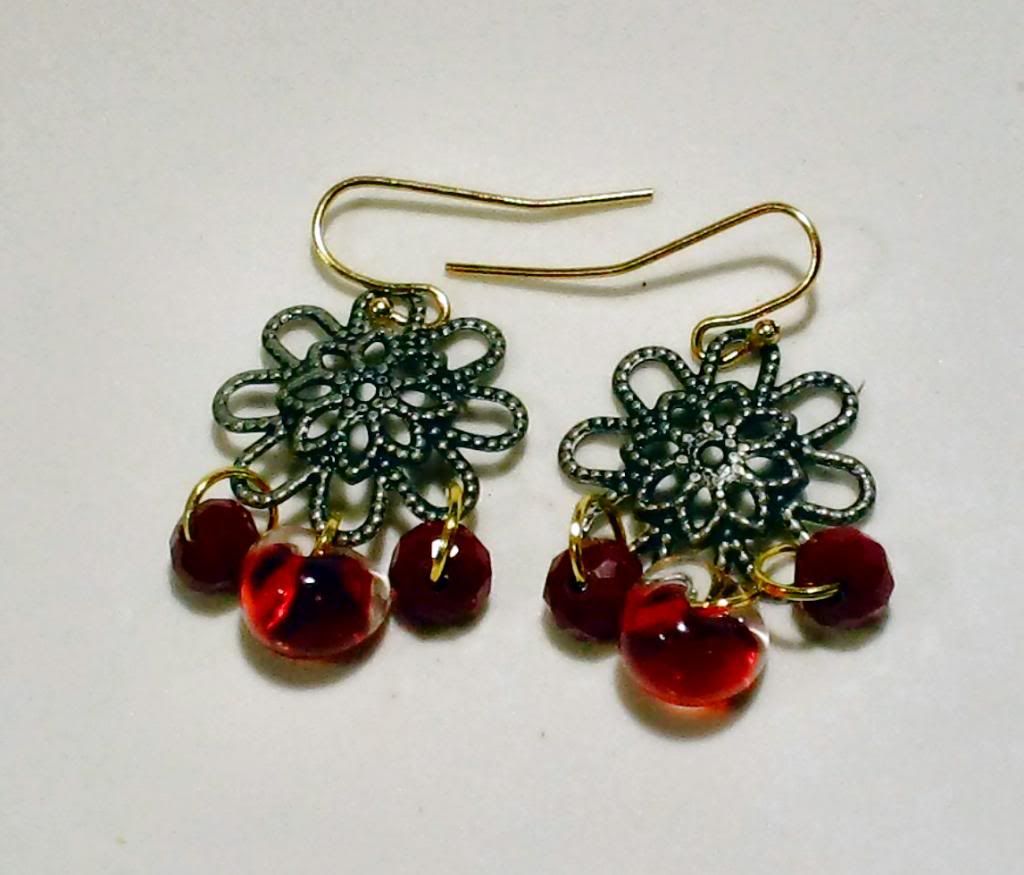
I took two gunmetal filigree bead caps and squished the little buggers flat... then used some gold jump rings to attach a couple faceted garnet rondelles and the Unicorne glass drop beads to the bottom. And I only lost one garnet and three jump rings somewhere beneath my desk >.< lol
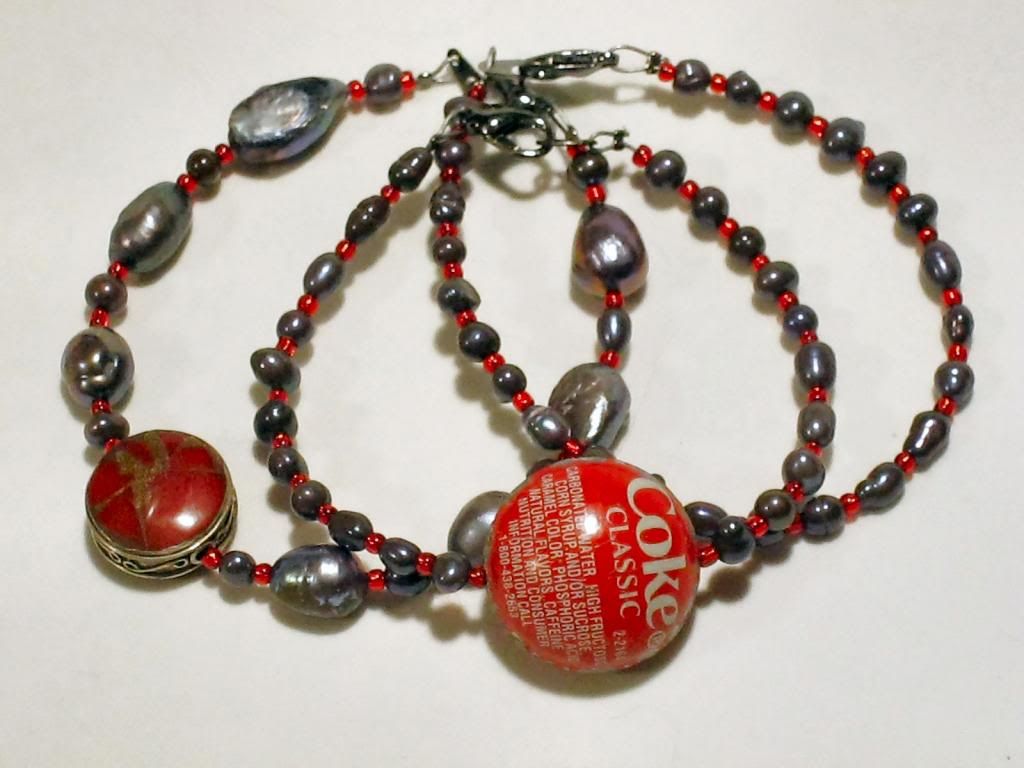
The next done is actually three pieces... what I'd originally intended to be a triple strand bracelet changed it's mind as I was still working on the different strands, and instead became a ' stack' of bracelets. I'd add in a few bangles to fill out the stack, but haven't made 'those' yet.. so here are the three main ones...
 |
| Coke bracelets |
I used the coke bottle cap bead, and the other red & metal bead form Lucie, and paired it up with more pearls - this time some gunmetal coloured ones in various sizes, and more little red glass seed beads as spacers.
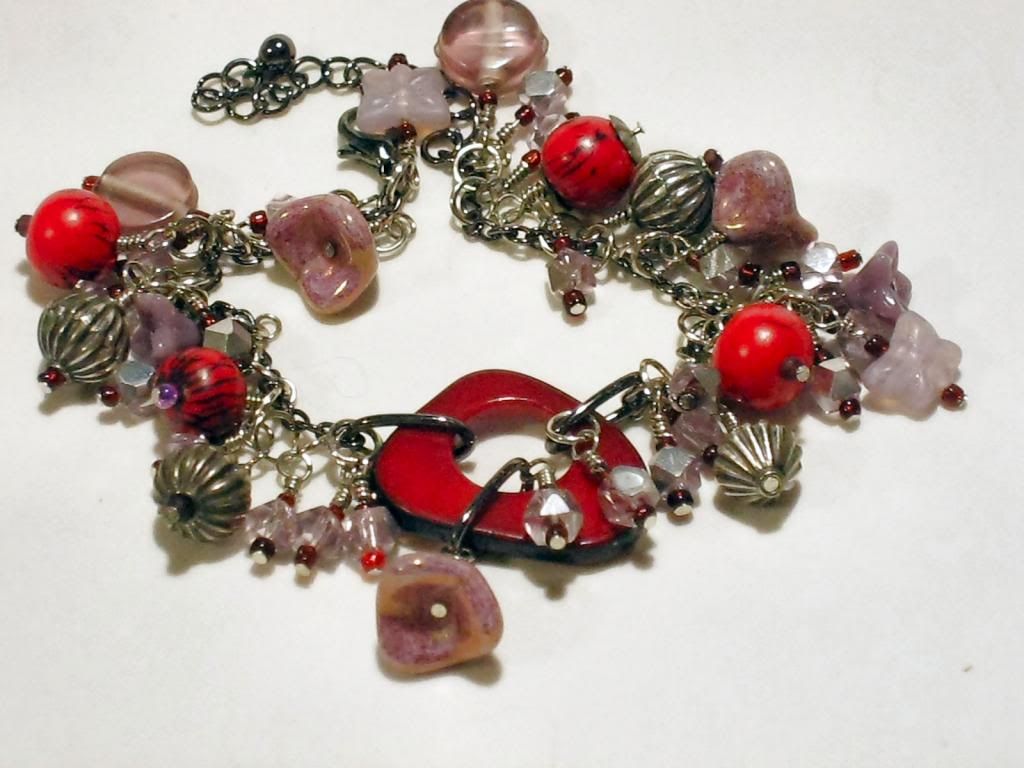
The next piece was another one that was 'in progress' for a while. It began with the Tagua Nut toggle clasp, and the accompanying nut beads Lucie had sent.. I knew it was going to be a charm-style bracelet from the start, but beyond that I was a bit stumped. I kept getting over powered by the red >.< Finally I hit upon the perfect colour to ease of the fierceness of the red.. a choice I blame completely on Shelley Graham Turner and her darn purple bead situation. You may remember that from my post ' Sneak Attack', where my project bead faeries sent her a huge box of purple beads... Which she turned into another group called Jilly's Bead Posse, where we all make purple jewelry to donate to raise funds for Alzheimer's in memory of Shelley's sister Jill.
Anyhow, thanks to Shelley, I ended up with purple taking over my creative center of my brain, and knew the only way I was going to get this bracelet made was to use purple. Decision made, I then sorted through to find the right shade of purple... then the fun began. I started making dangles only to run out of head pins... so I had to take a break and run out for more. Then after making a couple dozen mixed dangles, I decided one style in particular, and rather then do a bracelet full of mixed ones, I'd do mainly these... the already made dangles that no longer fit could be made into earrings later on.
I got all the dangles attached... and then ran into trouble with the toggle. First I didn't like the way I had it attached.. so I fiddled with it a few times... then my adjustable clasp plan didn't work because I'd forgotten to check my chain link size versus my lobster clasp >.< So I was faced with a heart breaking choice.. either remove EVERYTHING and put it on a bigger linked chain... or do a simple lobster clasp with an extender chain and use the tagua clasp for a different project.
Which way did I go...?
 |
| Garden Charms |
Neither :)
I nipped the bracelet in the center and turned half the toggle clasp into a focal instead, attaching the chain to either side. I added a third link with a flower and crystal dangle off the new focal, just because I felt like it :)
The red parts are all from Lucie, and are all natural nut beads :)
This bracelet will be heading off to Shelley to be sold in support of Jilly's Bead Posse's Alzheimer's efforts :) I might be sending the coke bracelets too if I get the remaining bangles finished to complete the set. The pearls do have a very purplish tint to them, after all ;)
So, despite the delays and the issues that popped up, I'm happy with how things turned out, over all. It's going to be hard to part with that charm bracelet... that is one of those pieces that I love and want to make mine... but if I kept it it would rarely get worn, and I KNOW that. Far better to stick with my plan for it :)
Thank you for dropping in to check on me :) Sorry I've been pretty invisible around here this month. I'll try harder to blog more again! In the mean time, make sure to hop along the rest of this reveals list and enjoy some truly lovely work :) To find out what my partner did with the soup I sent her, click HERE.


